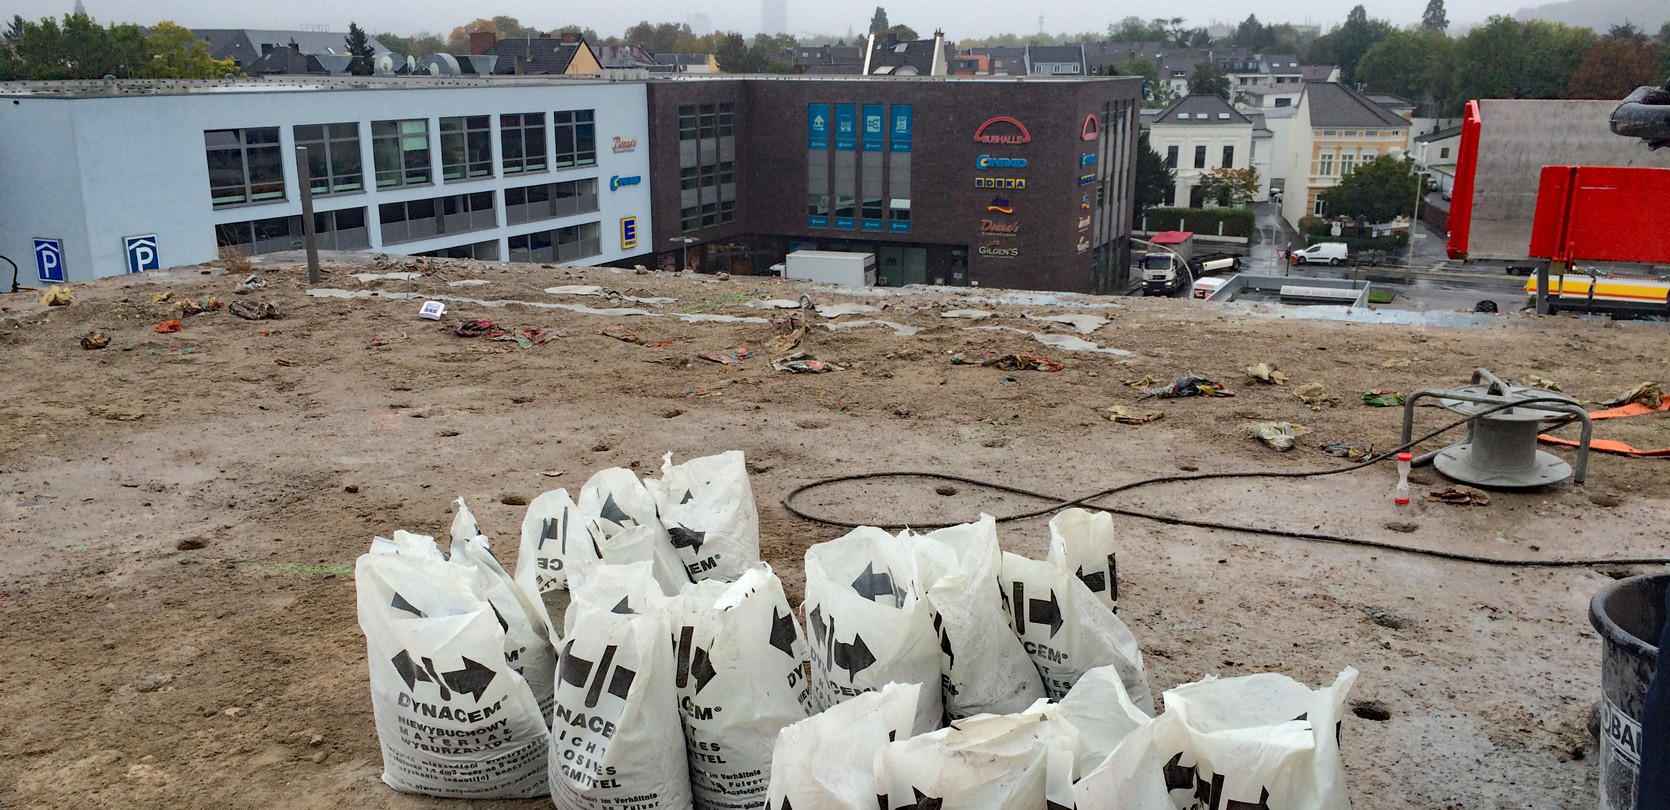

Skilful hole placement allows achieving the desired demolition effects in a short time and at small cost. Refer to Dynacem Data Sheet for details.
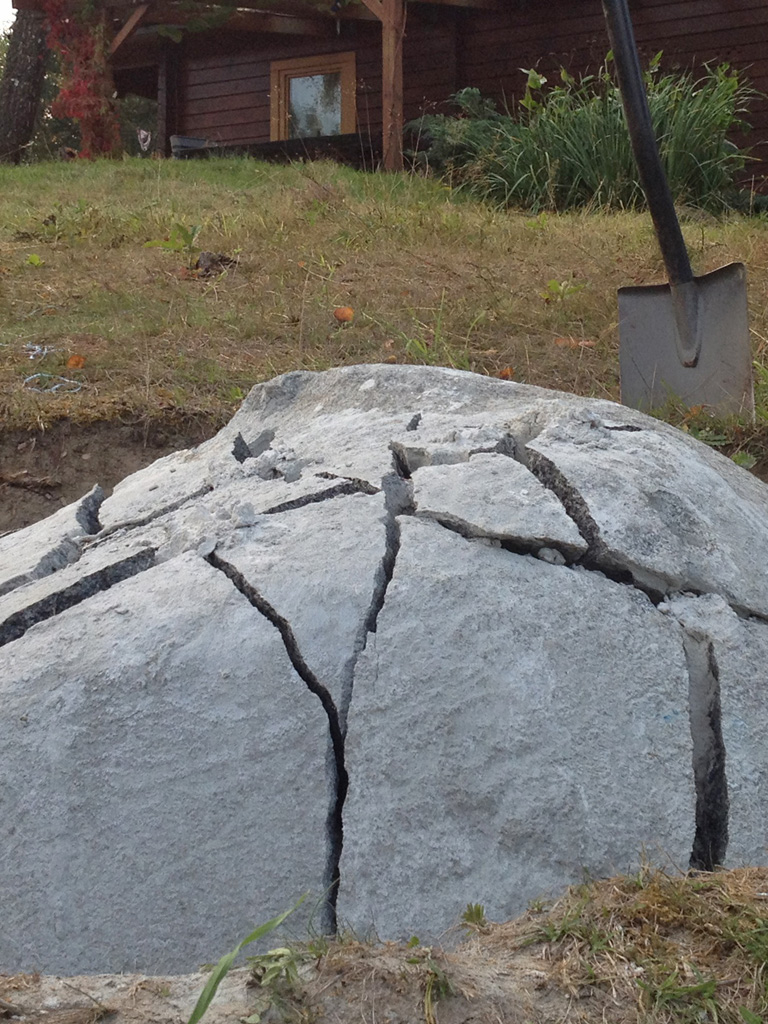
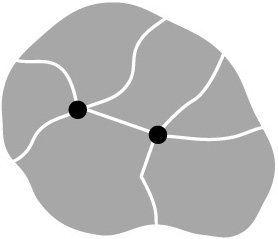
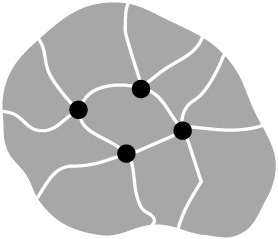
In rock and boulder breaking, one central hole causes 3 or 4 cracks to form. Increasing the number of holes will result in more cracks and more chunks being formed.
In order for the cracks to develop and propagate, the element must have at least one free surface that is not in contact with any obstacles, so it can move without external resistance as the result of DYNACEM expansion.
Options for hole quantity:

The number of holes is chosen with regard to the element size (e.g. boulder, concrete base...) and to desired chunks size (possibilities of loading, transporting, or usage them on site are important).
The best results can be achieved drilling holes parallel to the free surfaces. In this case the entire expansion force moves the split fragments towards the free surface.
option A
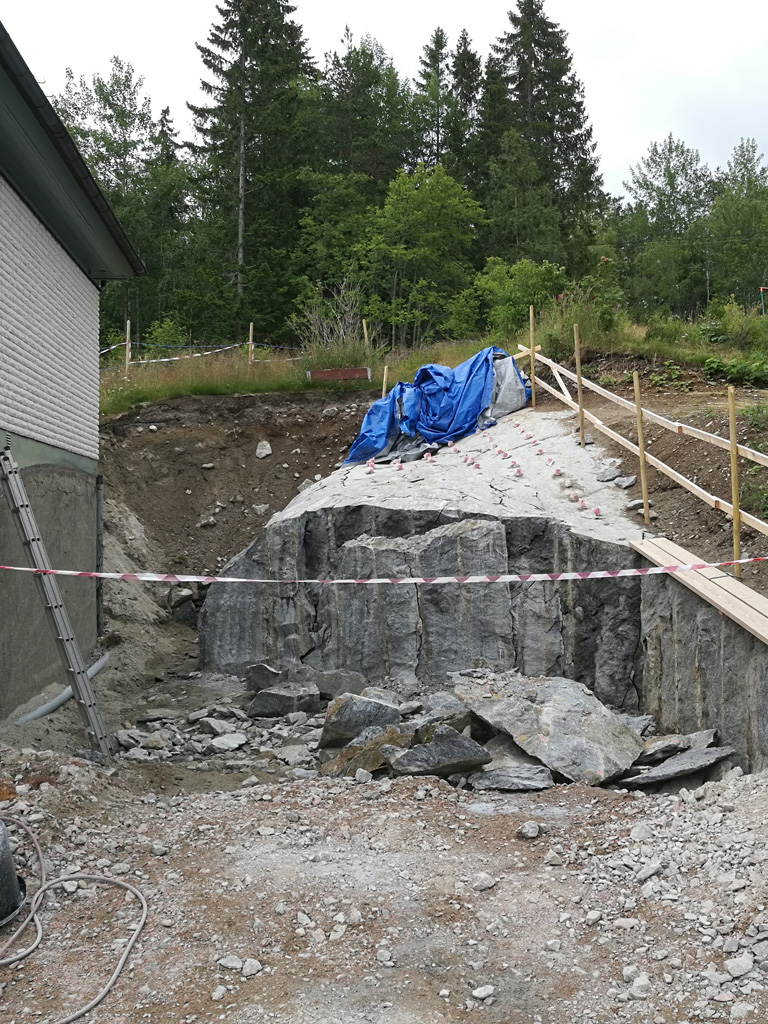
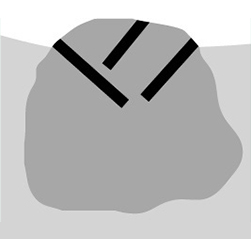
A rock is buried in the ground and the only free surface is the horizontal surface of its exposed hump. In this case horizontal holes are the best choice (often impossible to drill). Skewed holes are effective too, while vertical holes are completely ineffective.
option B
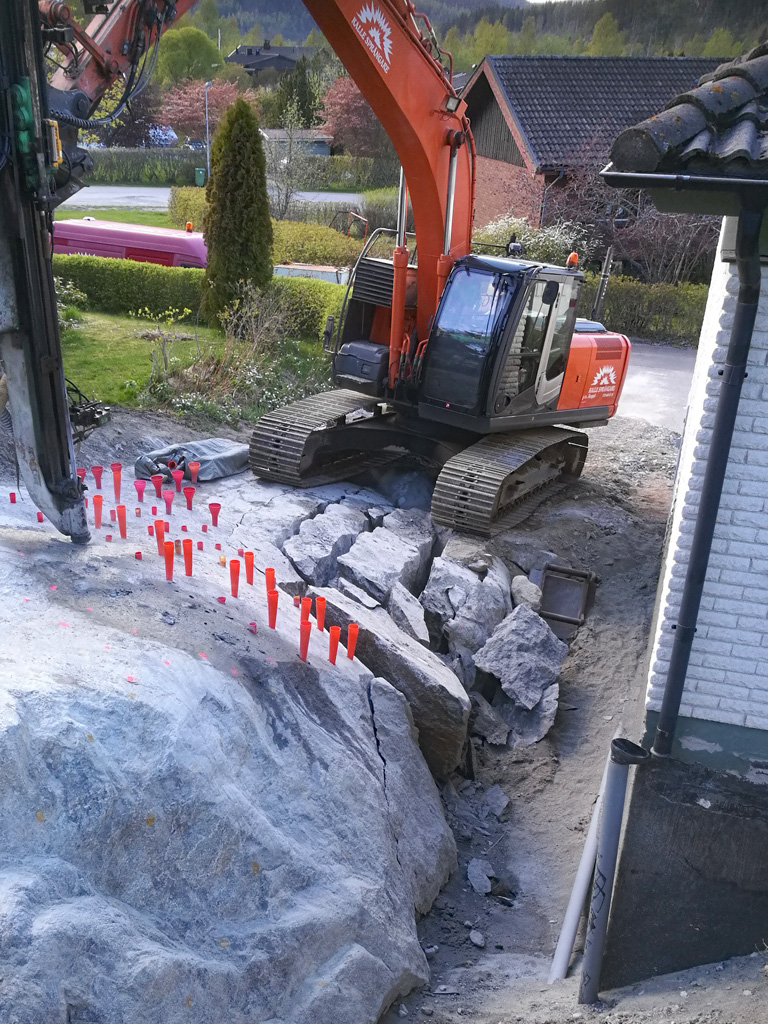
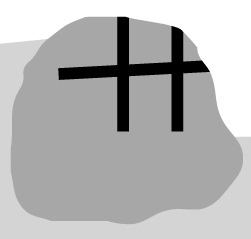
Excavating the rock on one side creates a free side surface and allows the vertical holes to become effective.
option C
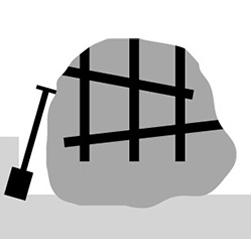
If a rock is completely excavated, or rests at the ground level, its entire surface is free allowing every hole direction to be effective. Hole depth should exceed 50 % of the rock diameter.
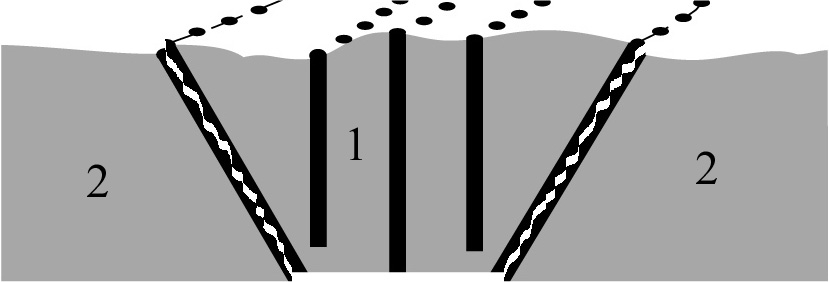
Possible placements and directions of effective holes in successive stages of excavation and expansion of the free surface.
option A:
option B:
option C:
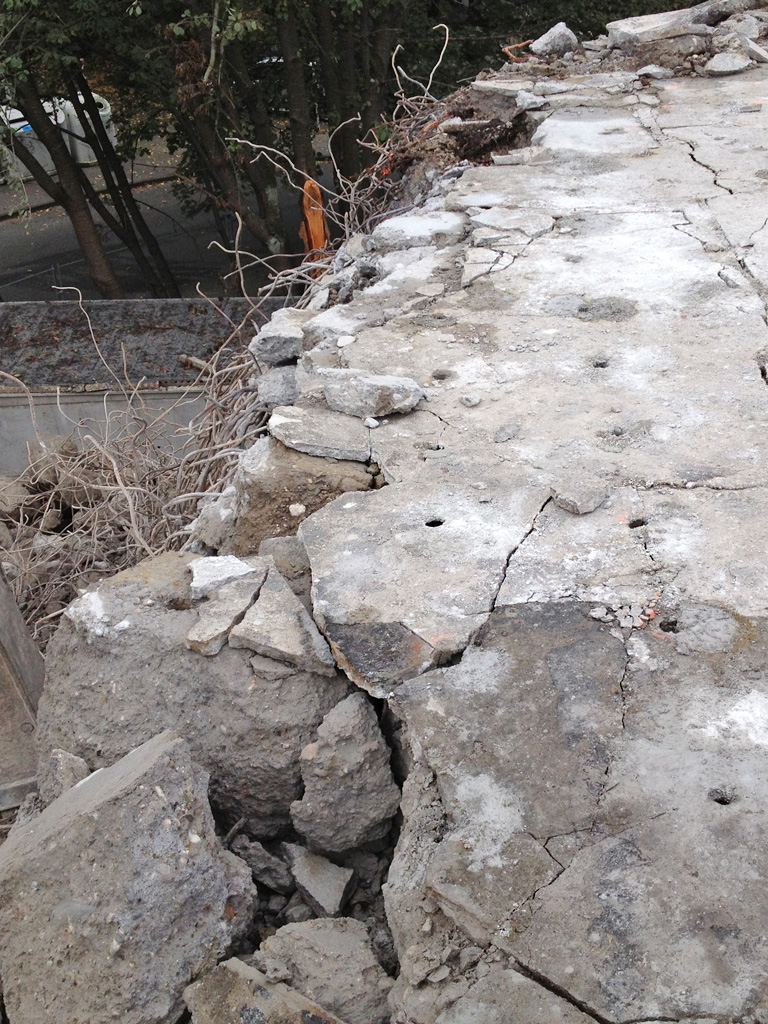
Slabs and concrete floors contained by walls, or large layers of rock have only one, horizontal free surface and vertical holes are ineffective. Begin demolition by drilling a lines of skewed holes in order to form a breakout that will expose additional free surfaces. Vertical or skewed holes can be used to demolish the remaining area.
Skewed holes create a breakout in the mother rock or a concrete slab. Pushing delaminated piece upwards (towards the horizontal free surface - the only one available in this case) creates two additional, skewed free surfaces:
1 - additional vertical holes should be drilled when delaminating thick layers to aid the diagonal holes,
2 - areas where using vertical holes is now possible.
Linear hole placement may, depending on their spacing, result in a single, or multiple cracks. The deciding factors are:
L - hole spacing, and
k - distance of the row from the free surface.
Options for hole spacing within a row:
- big spacing:
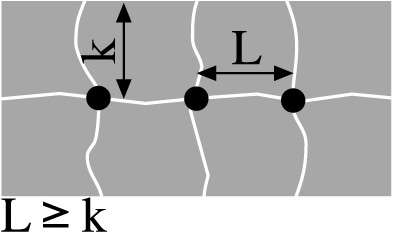
gives a main and perpendicular cracks,
- small spacing:
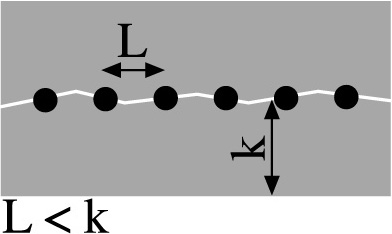
gives only a main crack.
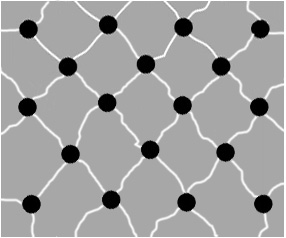
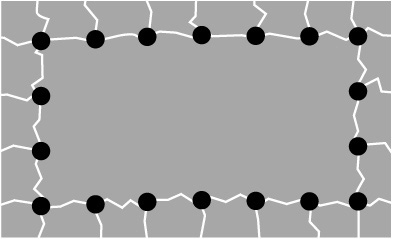
Raster hole placement causes crushing and destruction of the entire volume of the element.
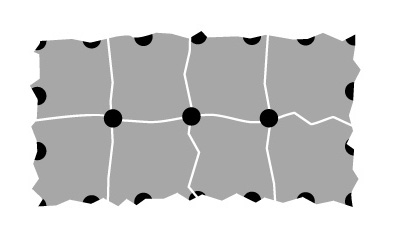
Linear hole placement causes splitting of the entire element into blocks fit for loading, transport and further usage, as they are not cracked.
Options for hole placement:
raster (crushing):
- linear (splitting):
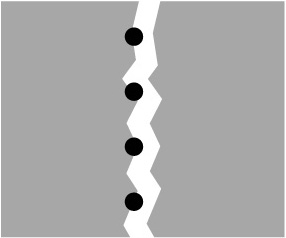
Empty holes "repel" cracks. A row of empty holes sets the crushing boundary.
Cracks do not propagate beyond the empty holes:

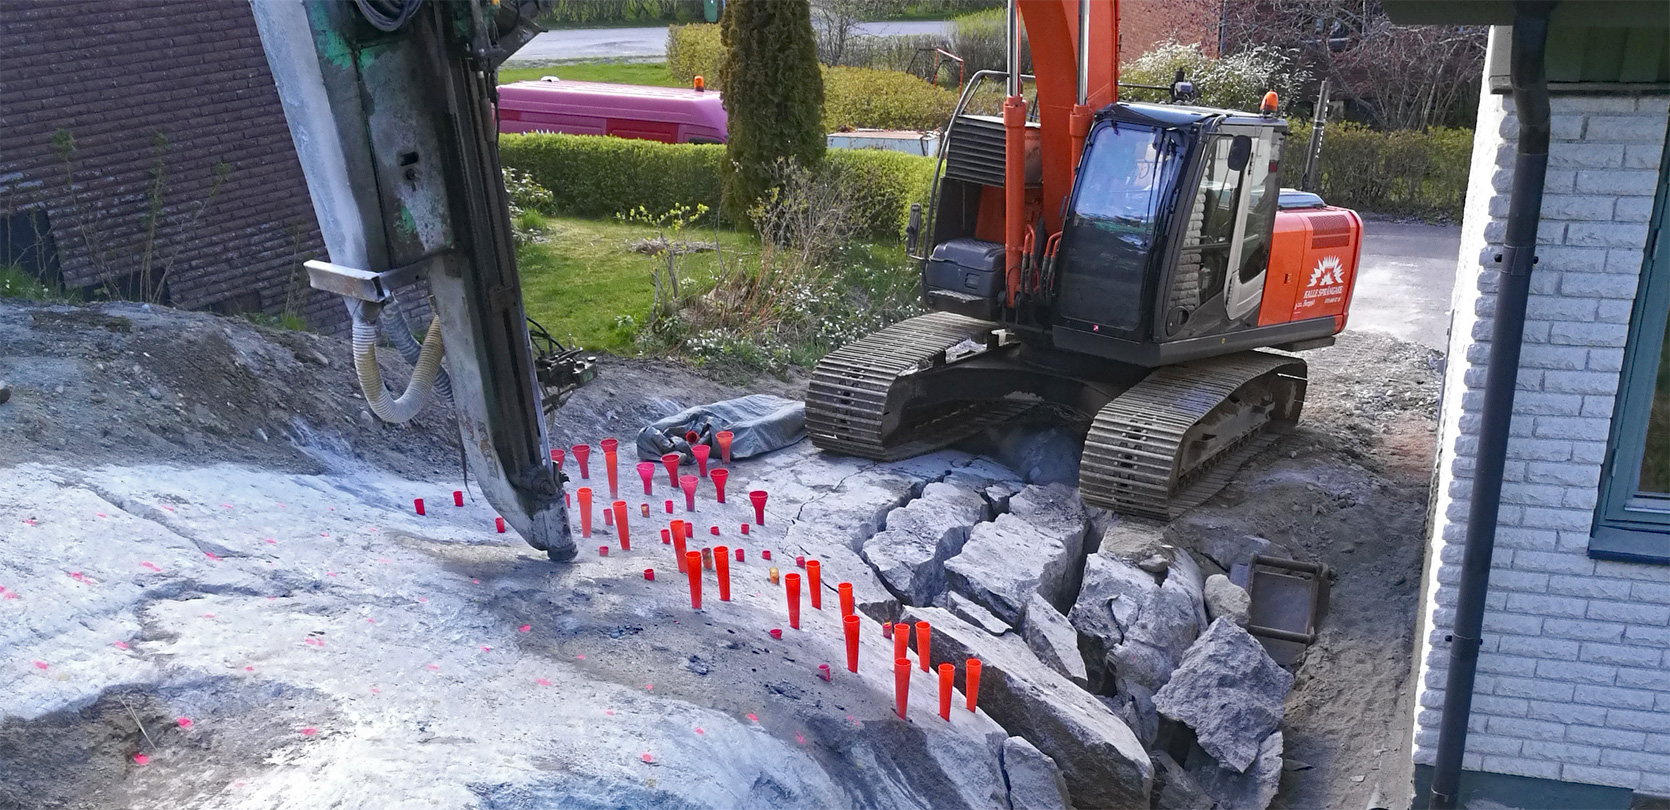
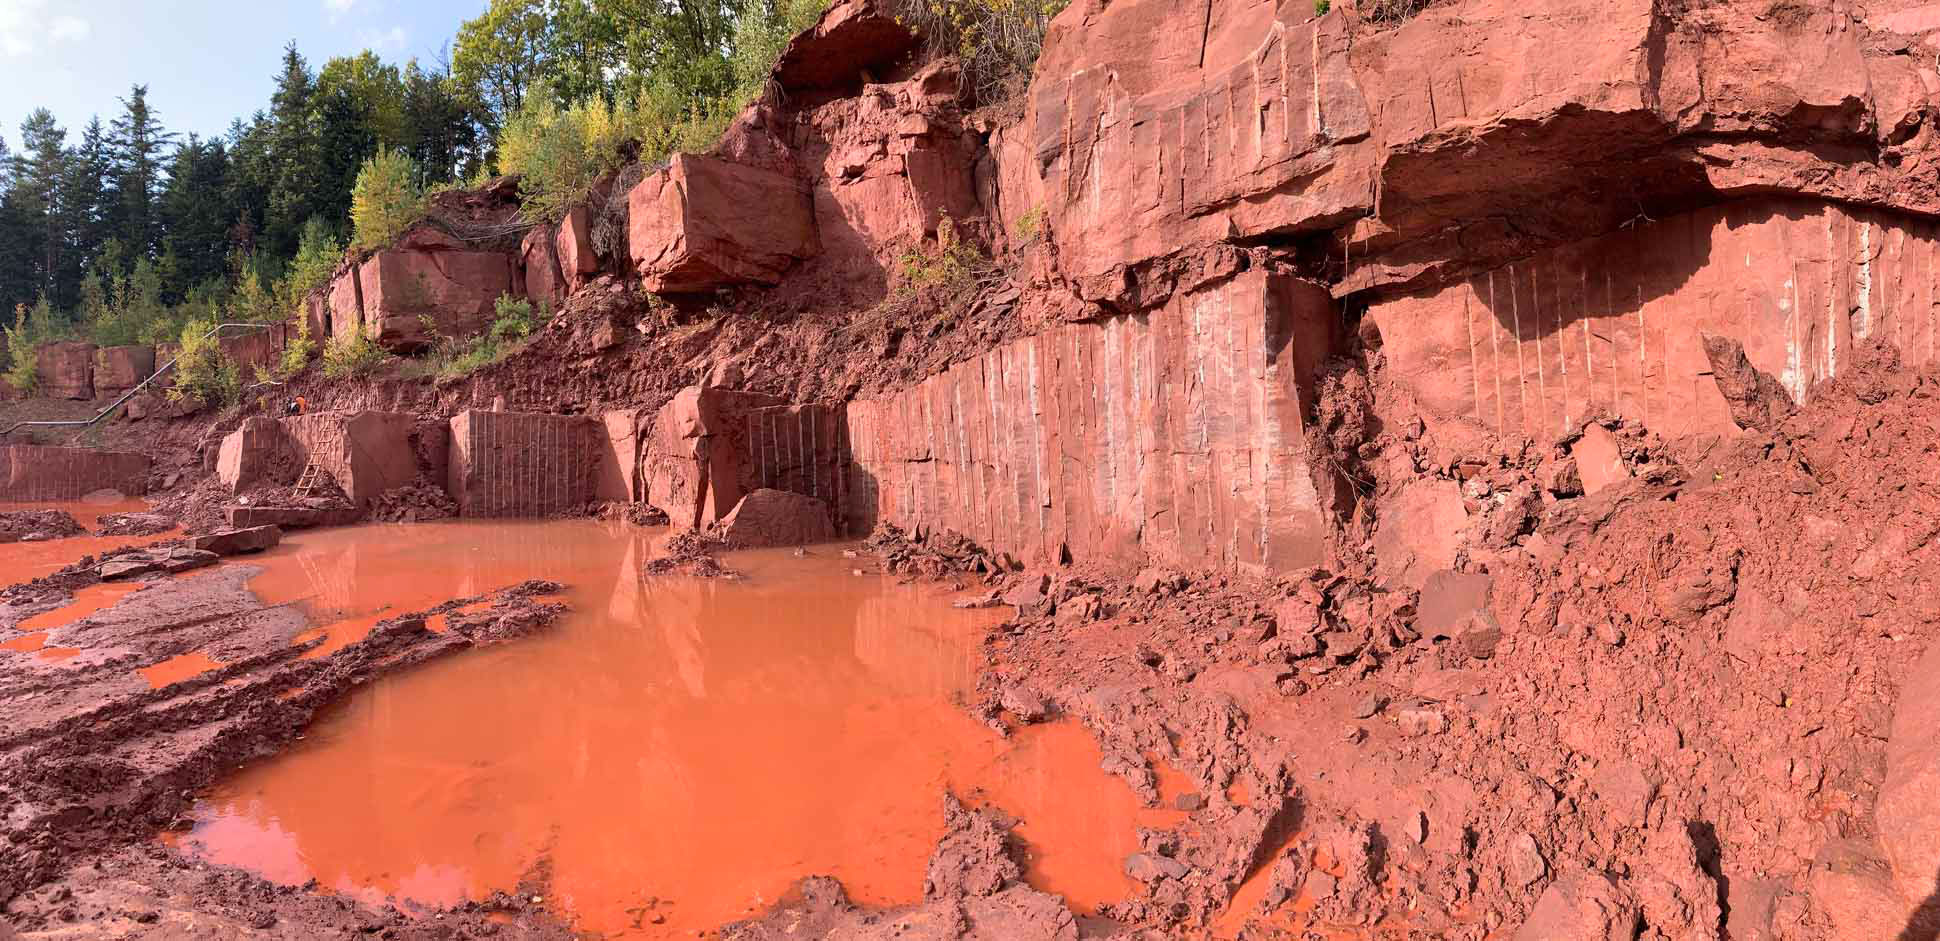
Removing a layer of mother rock begins with drilling a few smaller holes to remove the toe and obtain a regular, vertical free surface. Then more holes parallel to the new surface and reaching a few centimetres below the desired cut-off level are drilled. 2 consecutive rows are then filled up every 5 to 15 hours.
Breaking a rock slope with a toe, keep S < D.
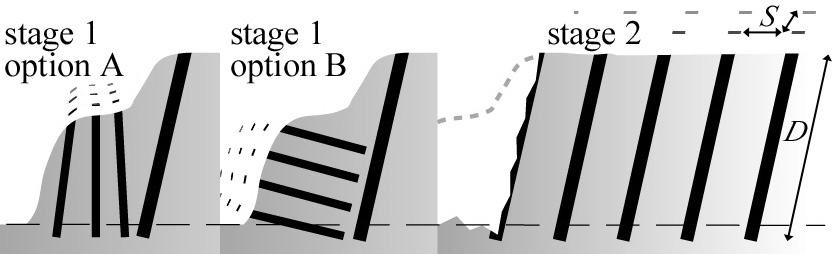
Hole spacing should not exceed (for hard / soft rock):
5x5/10x10 diameters in stage 1
10x10/20x20 diameters in stage 2
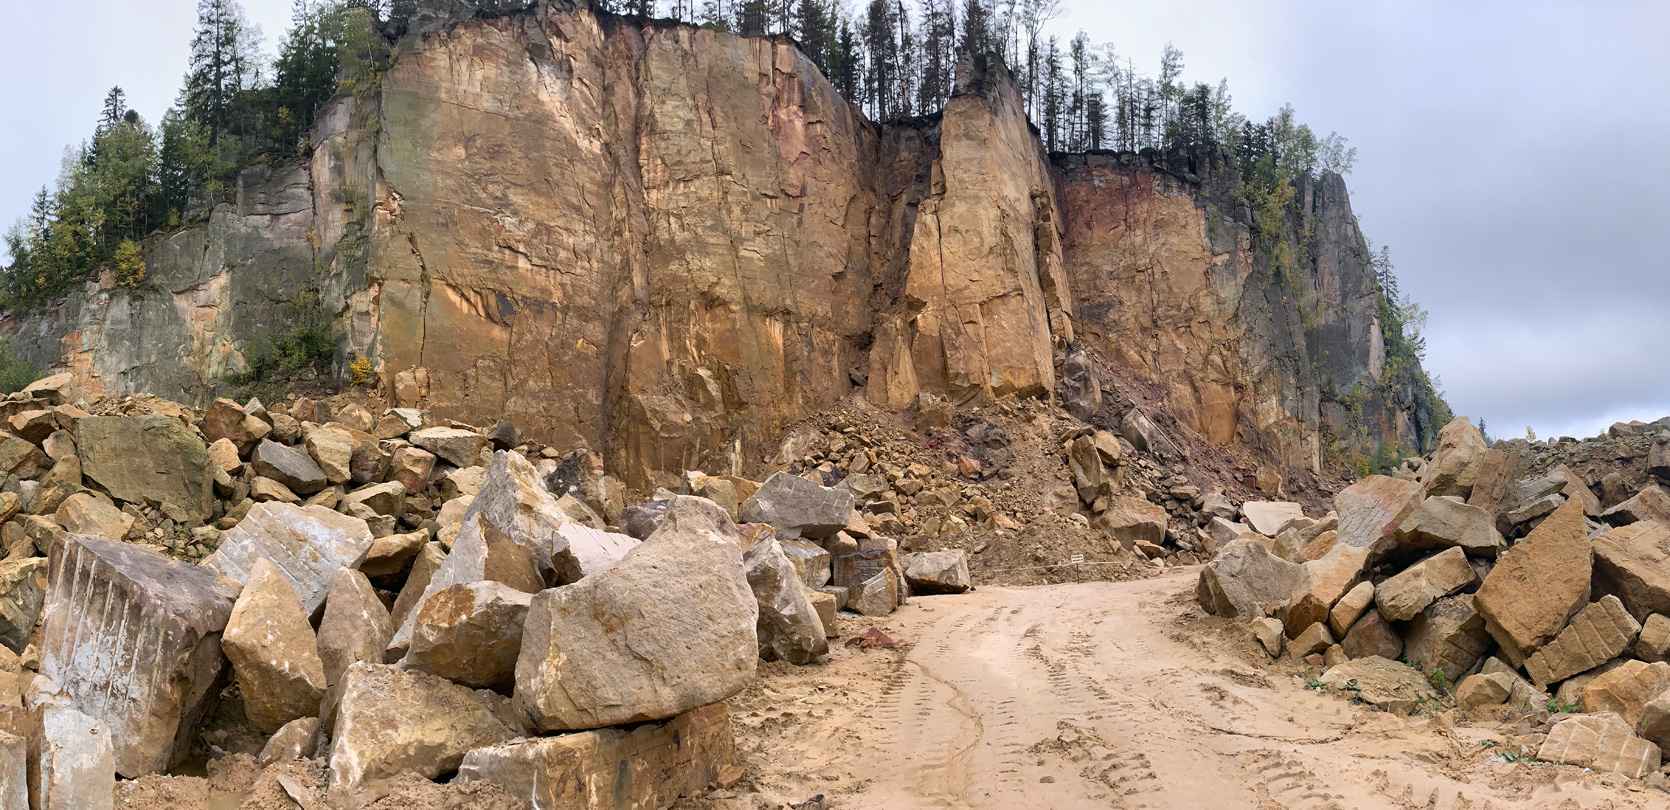
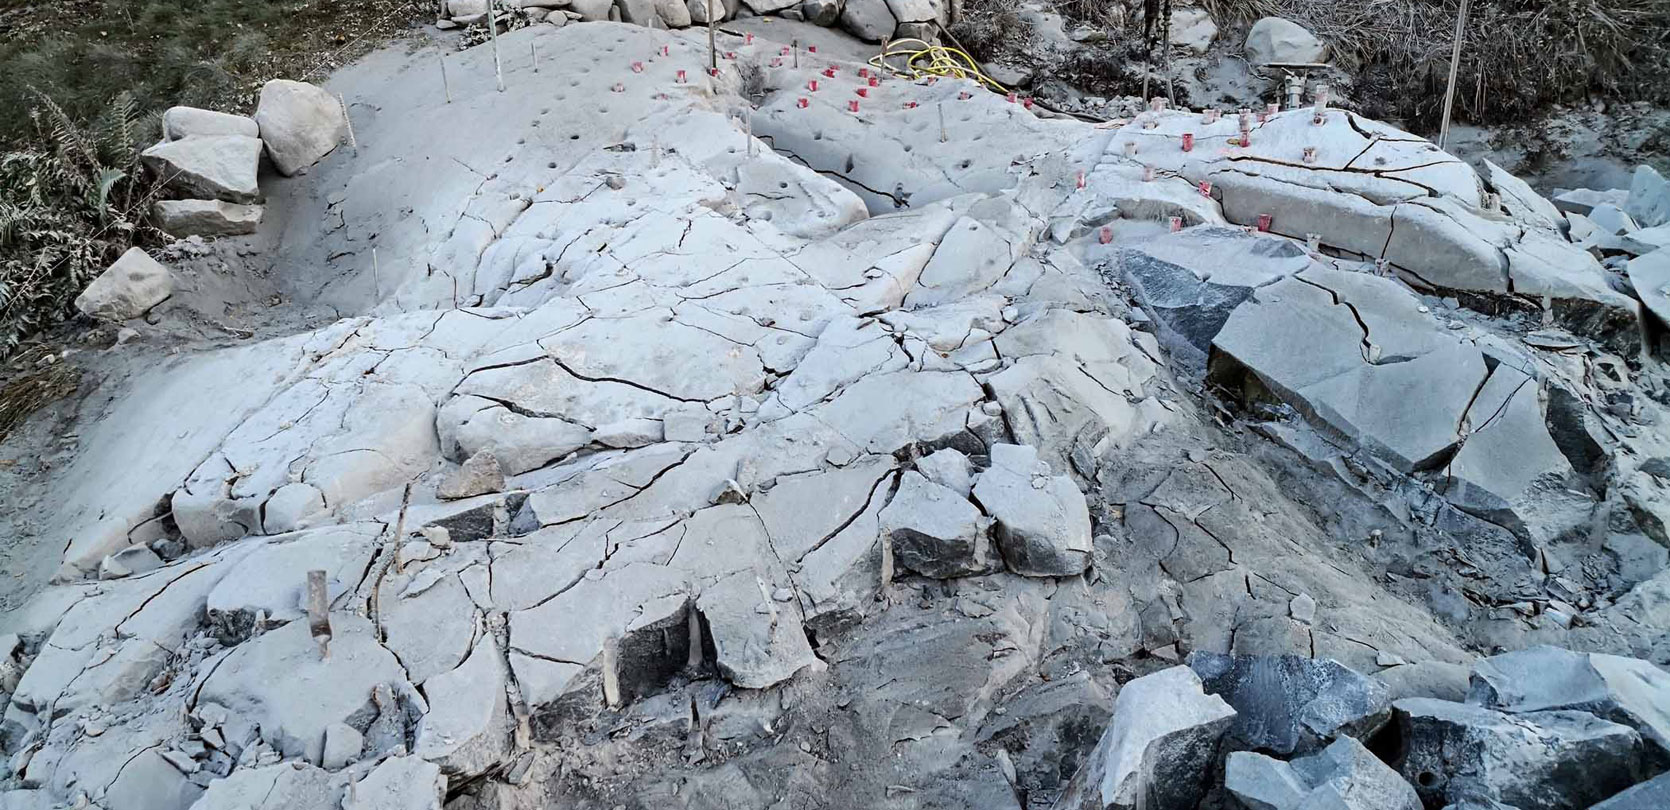
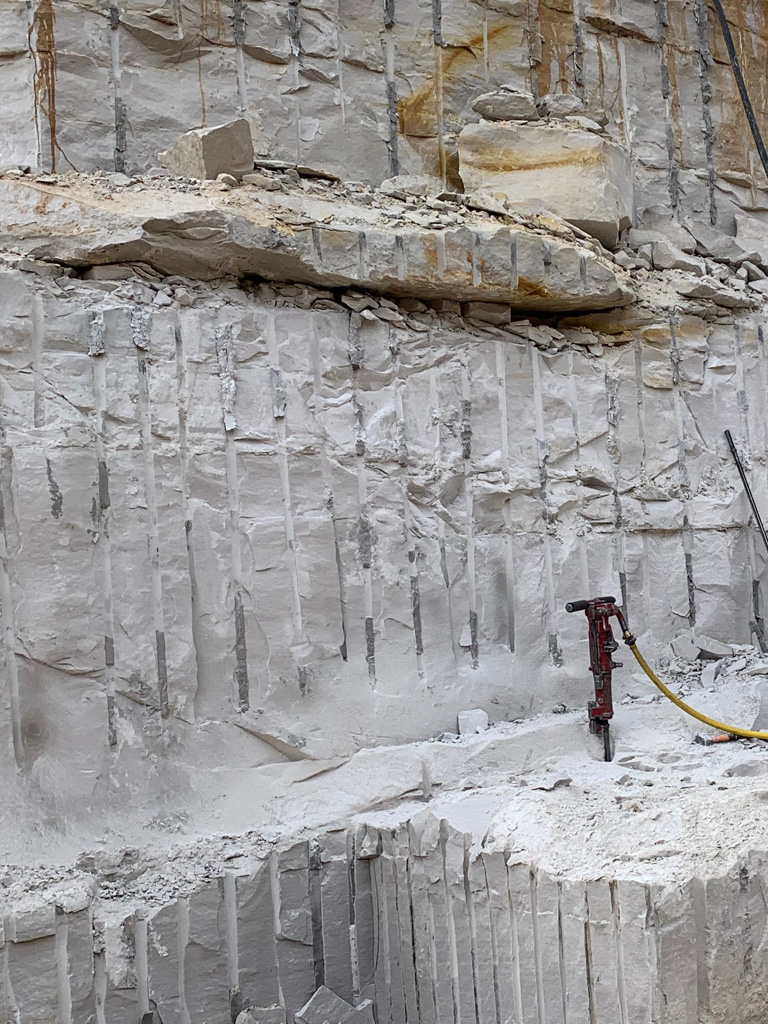
Quarrying blocks of sandstone, granite, and marble is conducted using rows of holes. Common hole spacing is 10 hole diameters. Despite smaller amount of holes being drilled, the number of damaged (cracked) blocks is much smaller than when explosives are used.
Drilling depth: 80 - 85 % of the block height. Block width: up to 300 cm (more may be possible). When no natural horizontal cracks are present, a line of horizontal holes needs to be drilled:

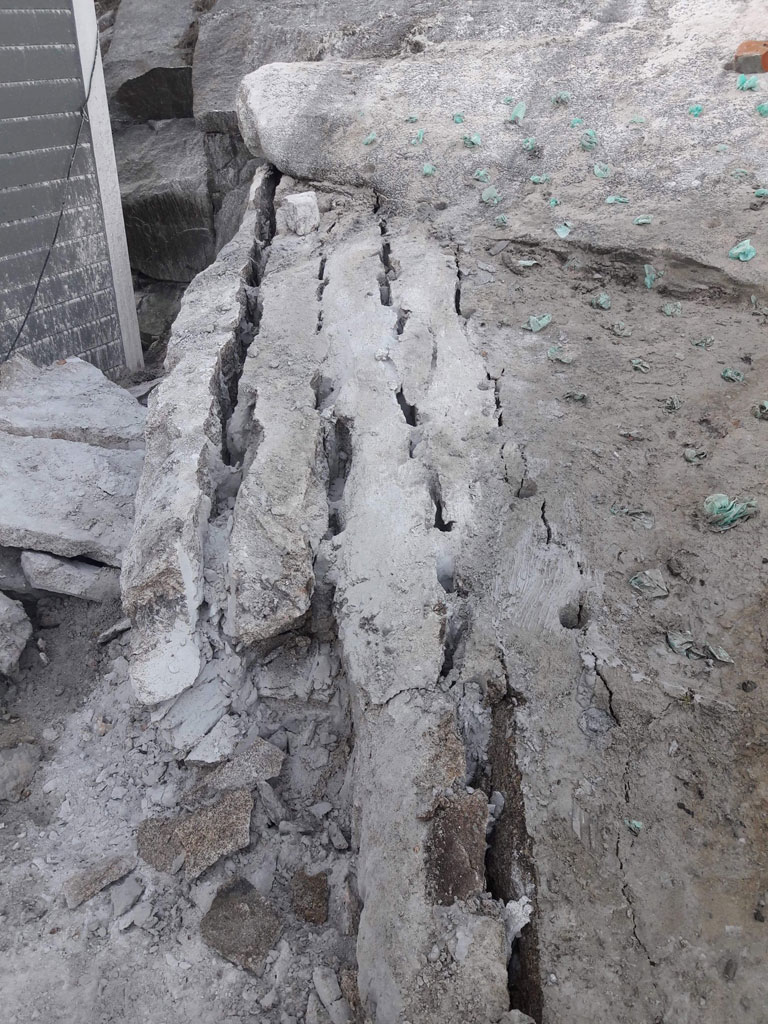
Long concrete and reinforced concrete foundations and beams can be demolished cheaply and quickly by dividing into pieces. Holes need to be drilled in a line perpendicular to the element. Inside and within the vicinity of resulting cracks, the reinforcement will be exposed and can be cut through very easily. Controlled demolition agent DYNACEM may tear apart reinforcing bars up to 10 mm diameter.
Inserting steel or wooden slats into the holes and aligning them with the desired cracking plane causes the entire expansion energy to be used for formation of wide cracks aligned in a given direction. No unwanted side cracks are formed.
Dividing reinforced concrete into pieces using linear hole placement.


Slats in the holes help to develop wider, single cracks.
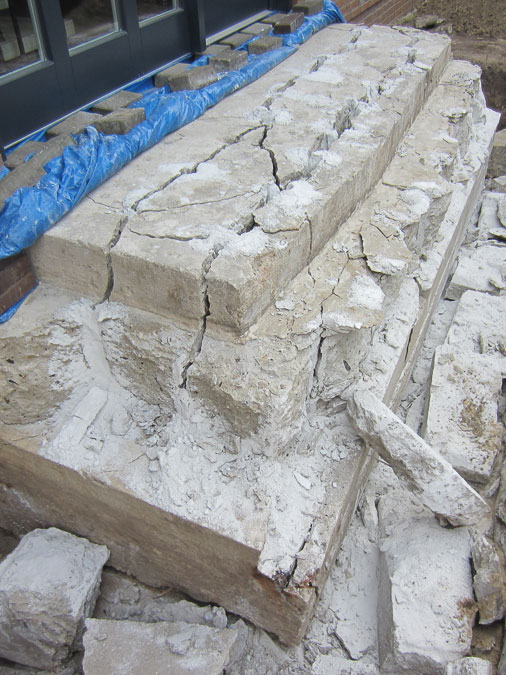
To crush a reinforced concrete element into small chunks, it is recommended to start with making a single row of holes 4 diameters away from the edge of the element. Resistance of the internal concrete block causes the expansion pressure to crush the concrete between the holes and the element surface and to release the reinforcement.
Then all that’s left is to crush, or split the remaining non-reinforced concrete block.
Stages of reinforced concrete crushing:
1 - reinforcement release and removal
2 - concrete crushing
With appropriate choice of hole diameter and spacing, the reinforcement is completely released.
Cutting through a concrete pile begins with making the first cut-off crack (using holes drilled radially towards the centre of the pile) and with releasing the reinforcement (using vertical holes drilled right behind the reinforcing bars). Then the remaining stump is crushed.
Cross-section and top-view of the pile head:
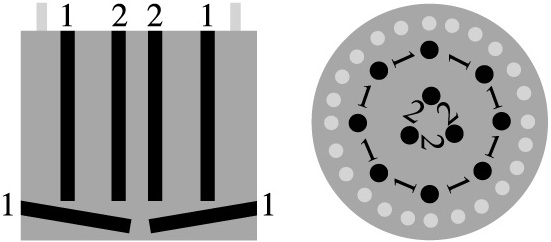
1 - holes filled in the first stage
2 - holes filled after removal of concrete crushed in stage 1